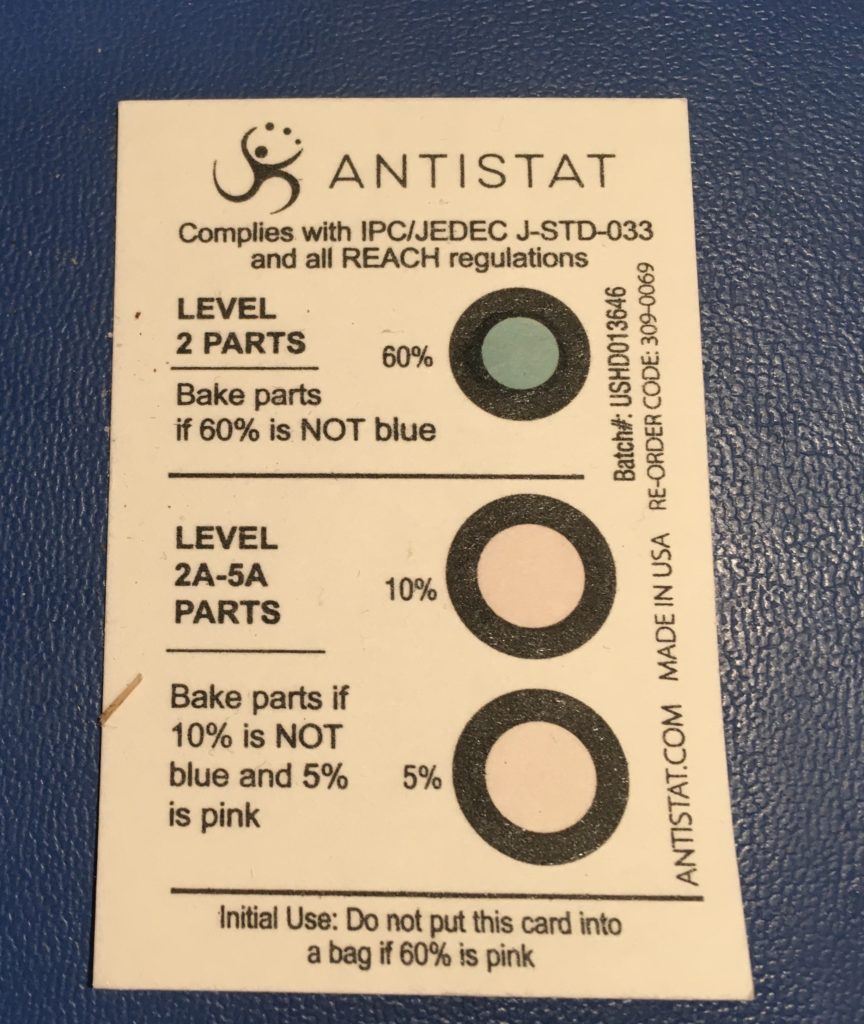
The picture above is what you might find when opening up parts for an electronics design that you are working on. As we mentioned in the last post, we will be talking about moisture sensitivity levels and baking PCBs / parts.
First a couple of definitions. When talking about PCBs, we are talking about printed circuit boards. Second, when speaking about “parts”, specifically we are talking about the components that are soldered onto the PCB. For example, resistors, capacitors, ICs (integrated circuits), etc.
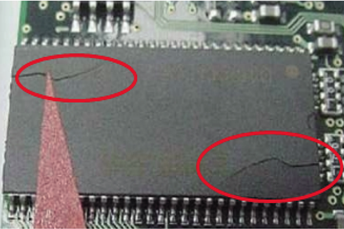
And with PCBs and “parts”, why do we care about moisture? Because we want our electronics to work! The issues mainly stem from the reflow soldering process. During reflow, the temperature is ramped up quickly. This is done for a variety of good reasons, but a bad thing that can result is that any trapped moisture doesn’t have time to escape. Instead it is likely to “popcorn” or damage the part or PCB that the moisture is trapped in. You can see an extreme example in the picture below.
Obviously, you want to prevent this from happening. The first thing to do is to see if any of the parts used in a design are moisture sensitive. Fortunately, the electronics industry is already aware of these issues, and that is why they created a measure called a “moisture sensitivity level” or MSL. This is covered in JEDEC and IPC specs in much greater detail (and of course much greater cost – yes you need to pay for their documents), but the main thing to know is what each level means. Wikipedia has an excerpt from the spec detailing each level. See the bulleted points below.
- MSL 6 – Mandatory Bake before use
- MSL 5A – 24 hours
- MSL 5 – 48 hours
- MSL 4 – 72 hours
- MSL 3 – 168 hours
- MSL 2A – 4 weeks
- MSL 2 – 1 year
- MSL 1 – Unlimited
The time mentioned after each MSL is the time the sealed package has been opened. While everyone gets excited when they receive parts from Digikey and want to open the sealed bags, this is one case where patience in wise. If the MSL is anything greater than 2, you should wait until you are ready to reflow before removing the parts from the bag. Most parts distributors today even print the MSL right on the package label. See an example from Digikey below.

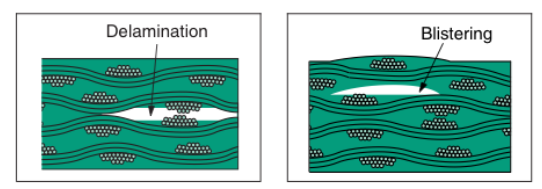
As mentioned previously though, it isn’t just parts that need baking – PCBs also should be baked before reflow as well. Unfortunately, there isn’t a simple moisture sensitivity level specification that your PCB manufacturer is going to send you with your new boards. In reality, you as the engineer needs to use your best judgement. If the PCBs come packaged in a sealed bag with desiccant, you do not need to bake them after opening them and reflowing them the same day. However, we always stray to the side of being risk averse here at HeaviDesign. The risks shown in the picture below are too great to not bake.
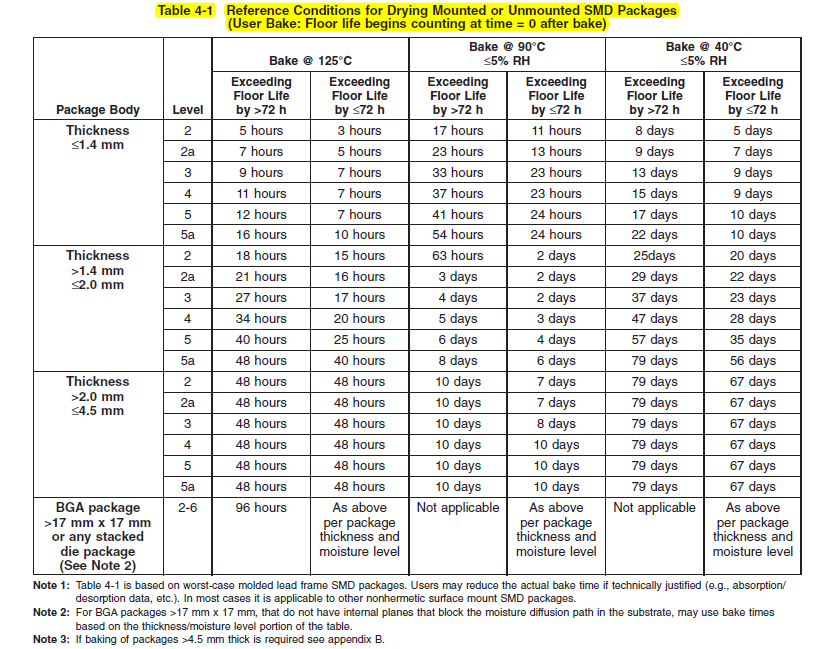
While we have established why we need to bake our parts and PCBs, how do we know how long to bake them? The table below gives a great way to determine how long things need to bake. A quick thing to note is that for temperatures less than 100C, there is a requirement for humidity to be less than 5%. Unless you have a controlled environment, it is usually best to bake at temperatures above the boiling point of water. For an example on bake times, take a simple 0402 package size LED with a moisture sensitivity level of 2a. If we had left the package opened on our bench for a week, we would bake the parts at 125C for 7 hours.
To bake your parts, you can use a Tiny Reflow Controller V2 and load our forked code, found here on Github. Our code adds a third option to the controller (besides leaded and lead-free). The third option is “Bake”. It is loaded on the controller in the picture below.
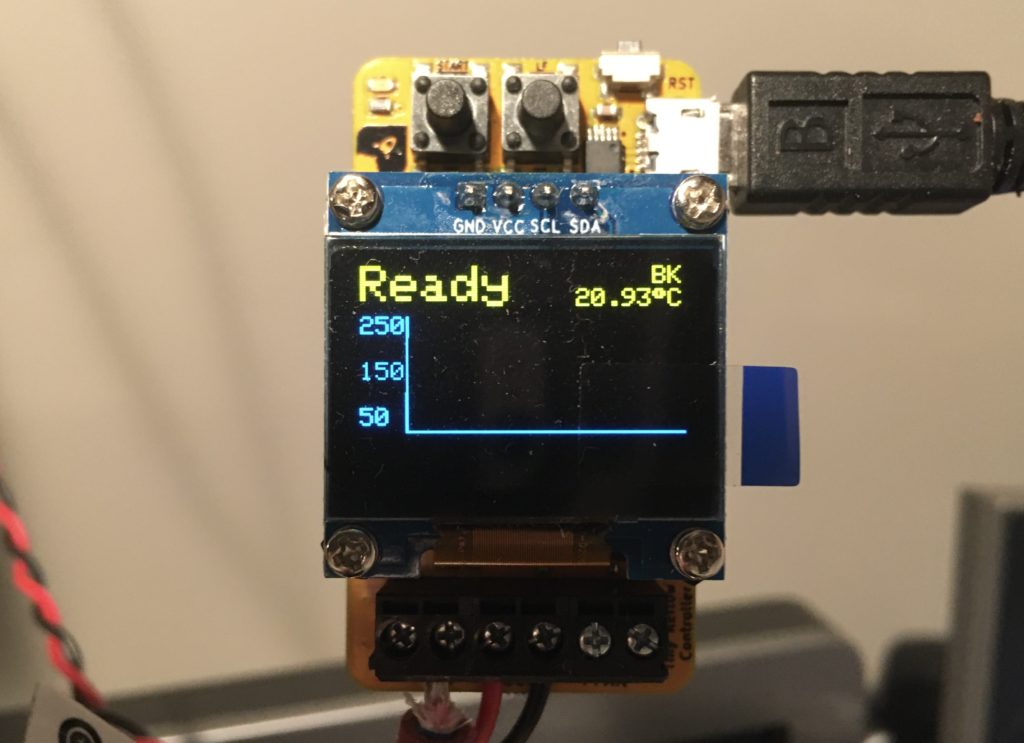
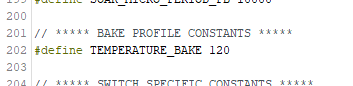
Once you hit the “Start” button, the controller will bring the oven to the set temperature and hold it there indefinitely. In the code loaded on Github, it is currently set to 120C. If you want something different, all you need to do is change the line of code shown below to your desired temperature.
In the next post, we will be discussing reflow profiles and some tricks to getting the Tiny Reflow Controller V2 working well if you run into the same issues we did.
Leave a Reply