
As a continuation from our previous post about building your own reflow oven, we will now go into detail about how to program the Tiny Reflow Controller V2.
Rocket Scream offers a tutorial on how to program their first version of the Tiny Reflow Controller, but they have not updated it for V2. The biggest difference between V1 and V2, besides the display, is the fact that the V2 is using an entirely different processor. The V1 uses the ATtiny1634R, while the newer V2 uses the ATmega328P. While this does not change too much with the setup, there are small nuances that need to be accounted for!
Step 1 – Download Arduino Software
This is by far the easiest step in how to program the Tiny Reflow Controller V2: look here for the latest Arduino IDE. Download it and install it.
Step 2 – Fork Rocket Scream Github Design
You can either download or fork the design from Github. We would suggest forking, as this allows for any code changes you make to potentially be rolled back into the main project. From a collaboration standpoint, this is essential to ensure the good work you do is allowed to be distributed and built on by others.
Step 3 – Open and Build the Arduino Project
The only file you really need in how to program the Tiny Reflow Controller V2 is “TinyReflowController.ino”. Open this file in the Arduino IDE. Now, if you are following along in the V1 tutorial, you will need to follow the following instructions for the V2.
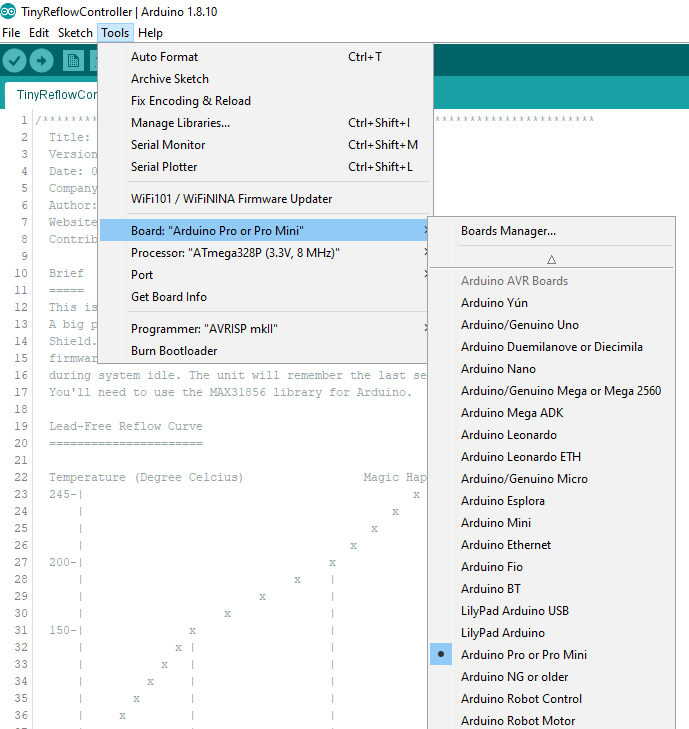
First, instead of downloading the ATtinyCore through the “boards manager”, you can skip that step. Instead, the V2 is built using a standard AVR board. Simply go to “Tools” -> “Board” -> “Arduino Pro or Pro Mini”. Your menu should like the following.
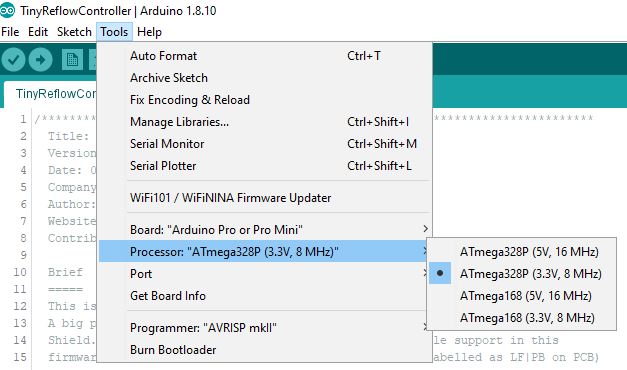
The next step is to choose the correct processor. Go to “Tools” -> “Processor” -> “ATmega328P (3.3V, 8MHz)”. Your menu should like the following.
Step 4 – Make Changes and Build the Project
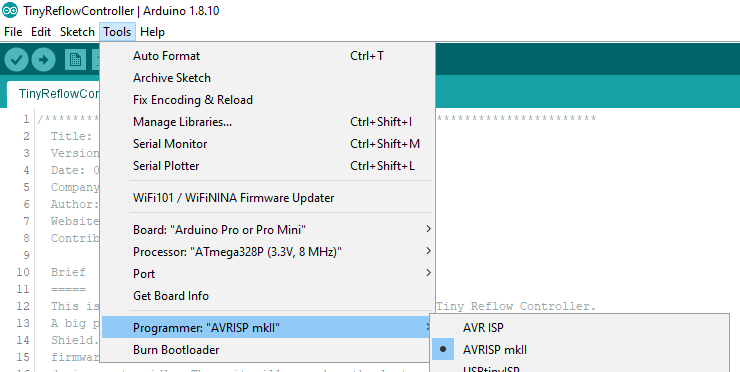
The last step is to make any code changes and to build the project. Once ready to build, ensure you have the correct programmer chosen. Go to “Tools” -> “Programmer:” -> “AVRISP mkII”. Your menu should look like that below.
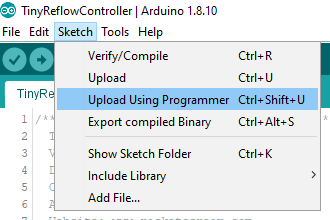
To build and upload to the Tiny Reflow Controller V2, go to “Sketch” -> “Upload Using Programmer”
Once it is complete, the controller should restart and be ready to go! Congratulations, you now know how to program the Tiny Reflow Controller V2
In the next blog post, we will discuss why we need to bake parts and boards, moisture sensitivity level (MSL) and what we added to the Tiny Reflow Controller V2 code.
Leave a Reply